Podcast Recording Tips: Home Setup or Studio Session?
Most advice about recording a podcast quietly assumes one thing: that you are on your own, in a bedroom, talking into a microphone with a duvet pinned to the wall behind you. That is a real setup and plenty of good shows have been made that way. But it is not the only setup, and the advice stops being useful the moment you invite someone else into the room or decide you want video.
This piece gives you honest tips for recording a podcast at home, stated without the usual overselling, and then is equally honest about where those techniques run out of road.
Start with the room, not the microphone
The most common mistake is spending money on a microphone before fixing the space. A good mic in a bad room sounds worse than a modest mic in a decent one, because a sensitive microphone picks up more of the reflections you were trying to avoid.
What you want is a room that is small, soft and quiet. Look for:
- Carpet or rugs. Hard floors bounce sound straight back at you.
- Soft furnishings. Sofas, curtains, cushions, a wardrobe full of clothes. All of it absorbs mid and high frequencies.
- Irregular shapes. A room with furniture, alcoves and bookshelves scatters sound better than an empty square box.
- Distance from noise. Away from the road, away from the boiler, away from the fridge.
Clap your hands once in the middle of the room. If you hear a ring or a flutter after the clap, you have reflections to deal with. Add soft material until the clap sounds dead and short.
The much-mocked wardrobe trick works for a reason. Hanging clothes are excellent broadband absorbers. If your only option is a small room with hard surfaces, recording with a wardrobe door open behind you genuinely helps.
Microphone choice and positioning
For home recording, a dynamic microphone is usually the safer choice over a condenser. Dynamics are less sensitive, which sounds like a disadvantage until you realise it means they pick up less of your untreated room and less of the traffic outside.
Position matters more than most people expect:
- Get close. A hand’s width from your mouth is a reasonable starting point for a dynamic mic. Closer means more of you and less of the room.
- Speak across the mic rather than straight into it, or use a pop filter, to control plosives on hard consonants.
- Keep the mic off the desk, or at least on a boom arm with some isolation, so that typing and knuckle taps do not travel up the stand.
- Once you find a position that works, note it down. Repeatability is the whole game.
Set your levels so that normal speech peaks comfortably below the top of the meter. Leaving headroom is far better than clipping, because a quiet recording can be brought up in editing and a clipped one cannot be rescued.
Habits that matter more than gear
- Record a few seconds of silence in the room at the start. It gives an editor a noise profile to work with.
- Turn off anything with a fan, a compressor or a hum. Fridges, air conditioning, laptops under load.
- Put phones in flight mode, including the ones in the room that are not recording.
- If you fluff a line, pause, then say it again cleanly. Clean restarts are far easier to edit than mumbled corrections.
None of this is glamorous, but these habits are the difference between an episode that needs an hour of repair and one that needs twenty minutes of tidying.
Where the DIY approach starts to break down
Everything above holds up well for one person talking into one microphone. The cracks appear quickly once the format changes.
Multiple guests in one room
With a single microphone and multiple guests in the room, you have two bad options. Either everyone leans in and takes turns, which kills the natural overlap that makes conversation enjoyable, or you set the mic back and capture the whole room, which means you also capture every reflection in it.
Moving to multiple microphones solves the first problem and creates a new one: bleed. Each mic hears the other speakers, slightly delayed and off-axis. In an untreated room this is messy. You lose the ability to edit one person’s track independently, because cutting their audio also cuts the version of everyone else that lives on their channel. Volume balancing becomes a compromise rather than a choice.
Proper spacing, directional mics and a treated room make multi-person recording manageable. A spare bedroom rarely gives you all three.
Adding video
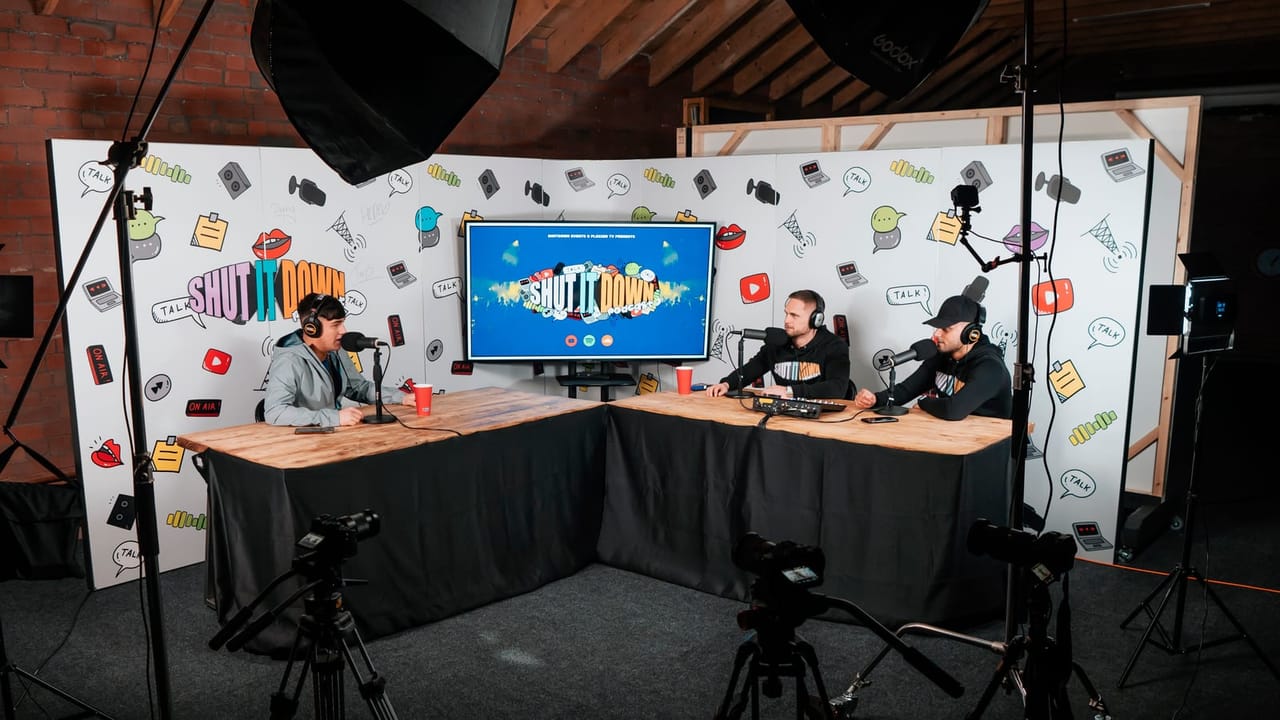
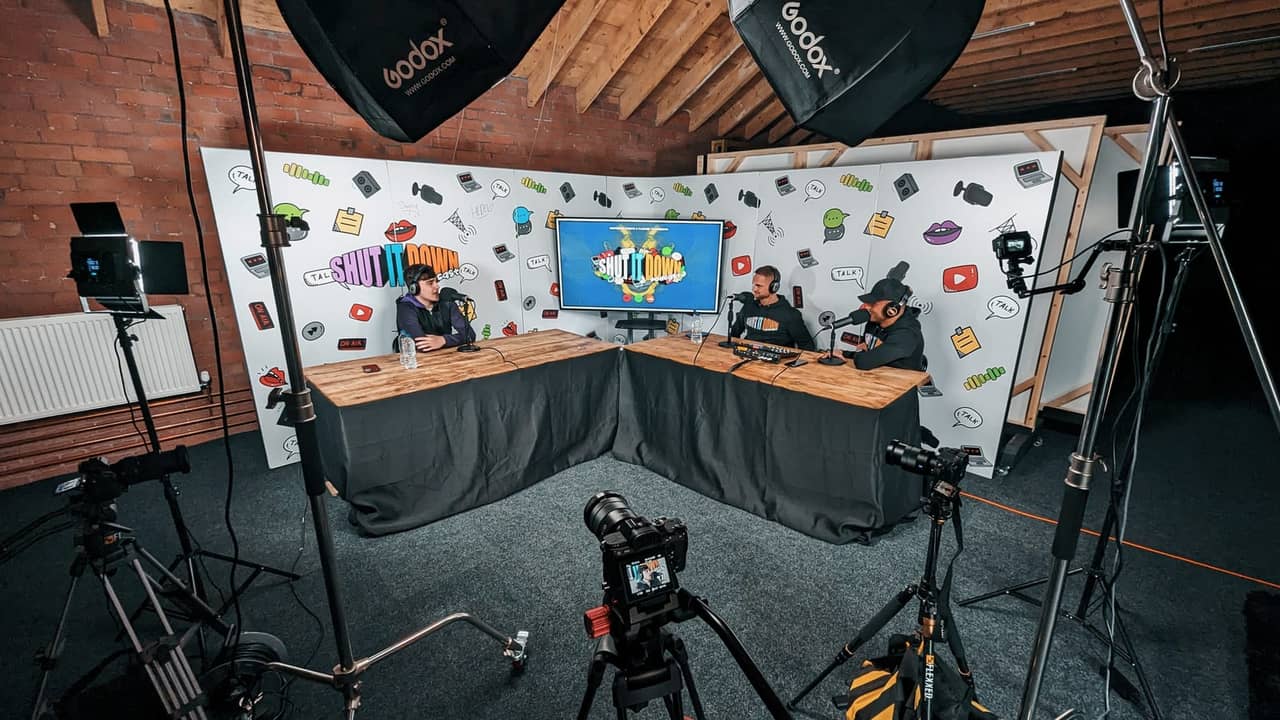
The moment you want video, the compromises stack. Your soft, cluttered, absorbent room is almost never the room you want on camera. Good lighting adds heat and sometimes fan noise. Cameras need distance that small rooms do not have. Mic stands that were invisible on an audio-only show now sit in the middle of the frame and have to be positioned for looks as well as sound.
You also take on multi-camera sync, matching exposure between angles, and the simple logistics of filming two or three people without one of them being in shadow. This is where home setups most often stop being a cost saving and start being a time sink.
Keeping episodes consistent
This one creeps up on people. Episode three sounds brighter than episode one. Episode seven has a hum. Episode nine was recorded in a different room because someone was visiting.
Level and tone consistency across a series is hard at home because too many variables move:
- Mic distance changes slightly every session.
- Gain gets nudged and not reset.
- Different times of day bring different background noise.
- Seasonal changes alter the room: windows open in summer, heating on in winter.
- Guests sit differently, speak at different volumes and lean in or back as they get comfortable.
Listeners rarely identify this consciously. They just find some episodes harder work than others. A fixed studio space removes most of these variables because the room, the mics, the positions and the signal chain do not move between sessions.
The decision point: when to book a studio
You do not need a studio to start a podcast. You probably do need one when several of these are true at once:
- You are regularly recording two or more people in the same room.
- You want video alongside the audio, or you are being asked for clips for social.
- You are spending more time fixing audio than making the show.
- Episodes sound noticeably different from each other and you cannot pin down why.
- Your recordings are at the mercy of noise you do not control: neighbours, roadworks, a building with thin walls.
- You are bringing in guests whose time is limited and you cannot afford a technical failure during their one available hour.
- The podcast is now tied to a business outcome, so the production standard has to match the brand.
A studio session solves the physical problems directly: a treated room, separate microphones on separate channels, monitored levels, and someone whose job is the technical side so that yours can be the conversation. For video, it also solves lighting, framing and camera coverage in one go. You can read more about how a podcast recording studio session is set up and what it includes.
What it requires from you is preparation.
What to bring and prepare for a studio session
Studio time is booked time. The difference between a productive session and a frustrating one is almost always planning rather than performance.
Before the day
- Agree the episode format and target length. Forty minutes of conversation needs a different plan to a fifteen minute interview.
- Write a running order, not a script. Segments, question areas, transitions, and a clear opening and close.
- Confirm your guest list and arrival times. If you are batching several episodes, stagger guests so nobody waits an hour in reception.
- Send guests the basics in advance: where to park, when to arrive, roughly how long they will be there, and what you will ask about. Prepared guests give better answers.
- Decide whether you are recording video. This affects wardrobe advice for guests, set layout and timing, so flag it early rather than on the day.
On the day
- Bring your notes and running order on paper or a tablet, not on a phone you will also be using.
- Bring a list of names, job titles and terms that need spelling correctly for show notes and captions.
- Bring any music, stings or sponsor reads you want included, or details of where they live.
- Allow time at the start for levels and a short warm-up conversation. The first two minutes of any recording are usually the stiffest.
- Think about batching. If your show is weekly, recording three or four episodes in one booking is usually the most efficient use of a session.
Afterwards
- Be clear about what you want delivered: raw multitrack files, an edited master, video versions, short clips, or some combination. Deciding this before you record is much easier than deciding after.
The honest summary
Home recording is a legitimate way to make a podcast, and if you are solo, disciplined and willing to work with your room rather than against it, the results can be genuinely good. The techniques above are not a consolation prize.
But DIY has a shape. It handles one voice well, two voices awkwardly, three voices badly, and video poorly. If your show has outgrown that shape, no amount of additional foam will fix it, and the time you spend trying is time not spent on the content that people actually turn up for.
If you have reached that point and want to know what a session would involve for your format, guest count and episode schedule, get a fast quote from Flexxed and we can talk through the practicalities before you commit to anything.
Questions
Frequently Asked Questions
Can I record a decent podcast at home without spending much?
Yes, for a solo show. A quiet carpeted room, a dynamic microphone close to your mouth and consistent habits will get you a listenable episode. The limits show up when you add multiple guests, video or a need for episodes to match each other.
Why do my podcast episodes sound different from week to week?
Usually because something in the chain changed: mic distance, gain setting, room conditions, background noise or the time of day you recorded. At home these variables are hard to lock down, so small drifts accumulate across a series.
Do I need a studio if I only have one remote guest?
Not necessarily. Remote guests recorded locally on their own end can work well. A studio matters most when two or more people are in the same room, or when you want video of that conversation.
What should I bring to a podcast studio session?
A running order, your guest list with arrival times, any names or terms that need spelling correctly, and a clear idea of what the finished episode should be. Bring notes rather than a full script unless you intend to read.
How many episodes can you record in one studio session?
It depends on episode length and how many guests rotate through, but batching several shorter episodes in a single booking is common and usually the most cost-effective way to use studio time.